I recovered my data from AWS S3 and all I got was this lousy bill.
Aidan – Alternate Headline.
TLDR;
- One of my hard drives failed, I thought I’d try to recover the valuable 400GB using ddrescue, it sort of worked.
- Restoring from S3 is expensive £27.53 for ~400GB
The Scenario
A week or so ago I realised that my hard drive was on the way out, its been on for almost 27,000 hours according to the SMART data. I first noticed when the PC was loading into check disk after every reboot. It took me about 3 reboots to decide something was up and I used Crystal Disk Mark to check the disk and sure enough it was reporting ‘Bad’. So I ordered 2*6TB drives and thought I’d better have a go at moving the data and making sure my backups were up to date.
For my backups, I use cloudberry backup (now called something else) which is an encryptable cloud backup solution which is compatible with Amazon’s S3. I use the cheapest storage option, S3 Glacier Deep Archive.
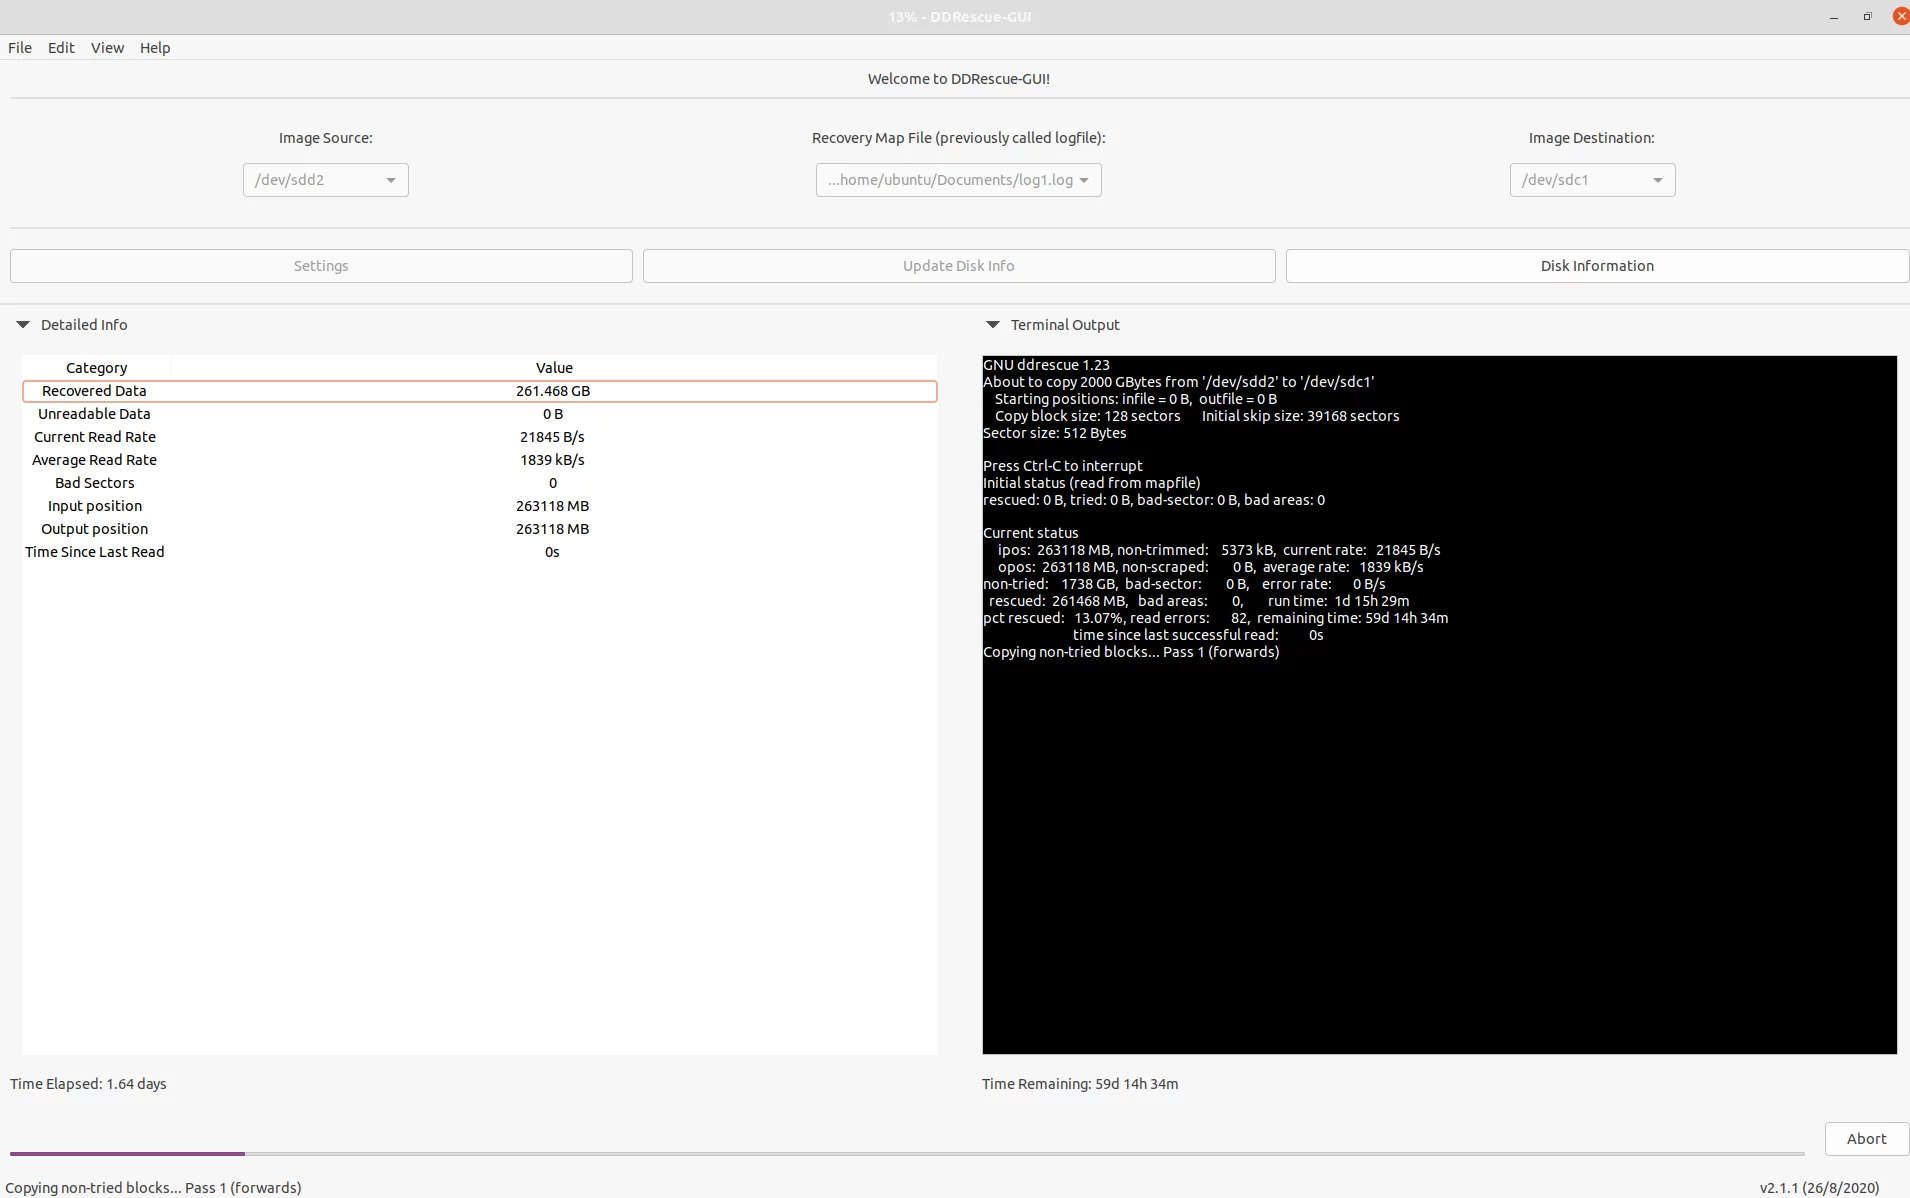
I booted in to a persistent live Ubuntu 20 environment and installed ddrescue, ddrescueview and ddrescue-gui. I found that the tools worked well but took way to long for the drive, you can see in the remaining time section of ddrescue-gui it would have taken an estimated 60 days to recover the data at the fastest setting.
Making DDRESCUE Faster
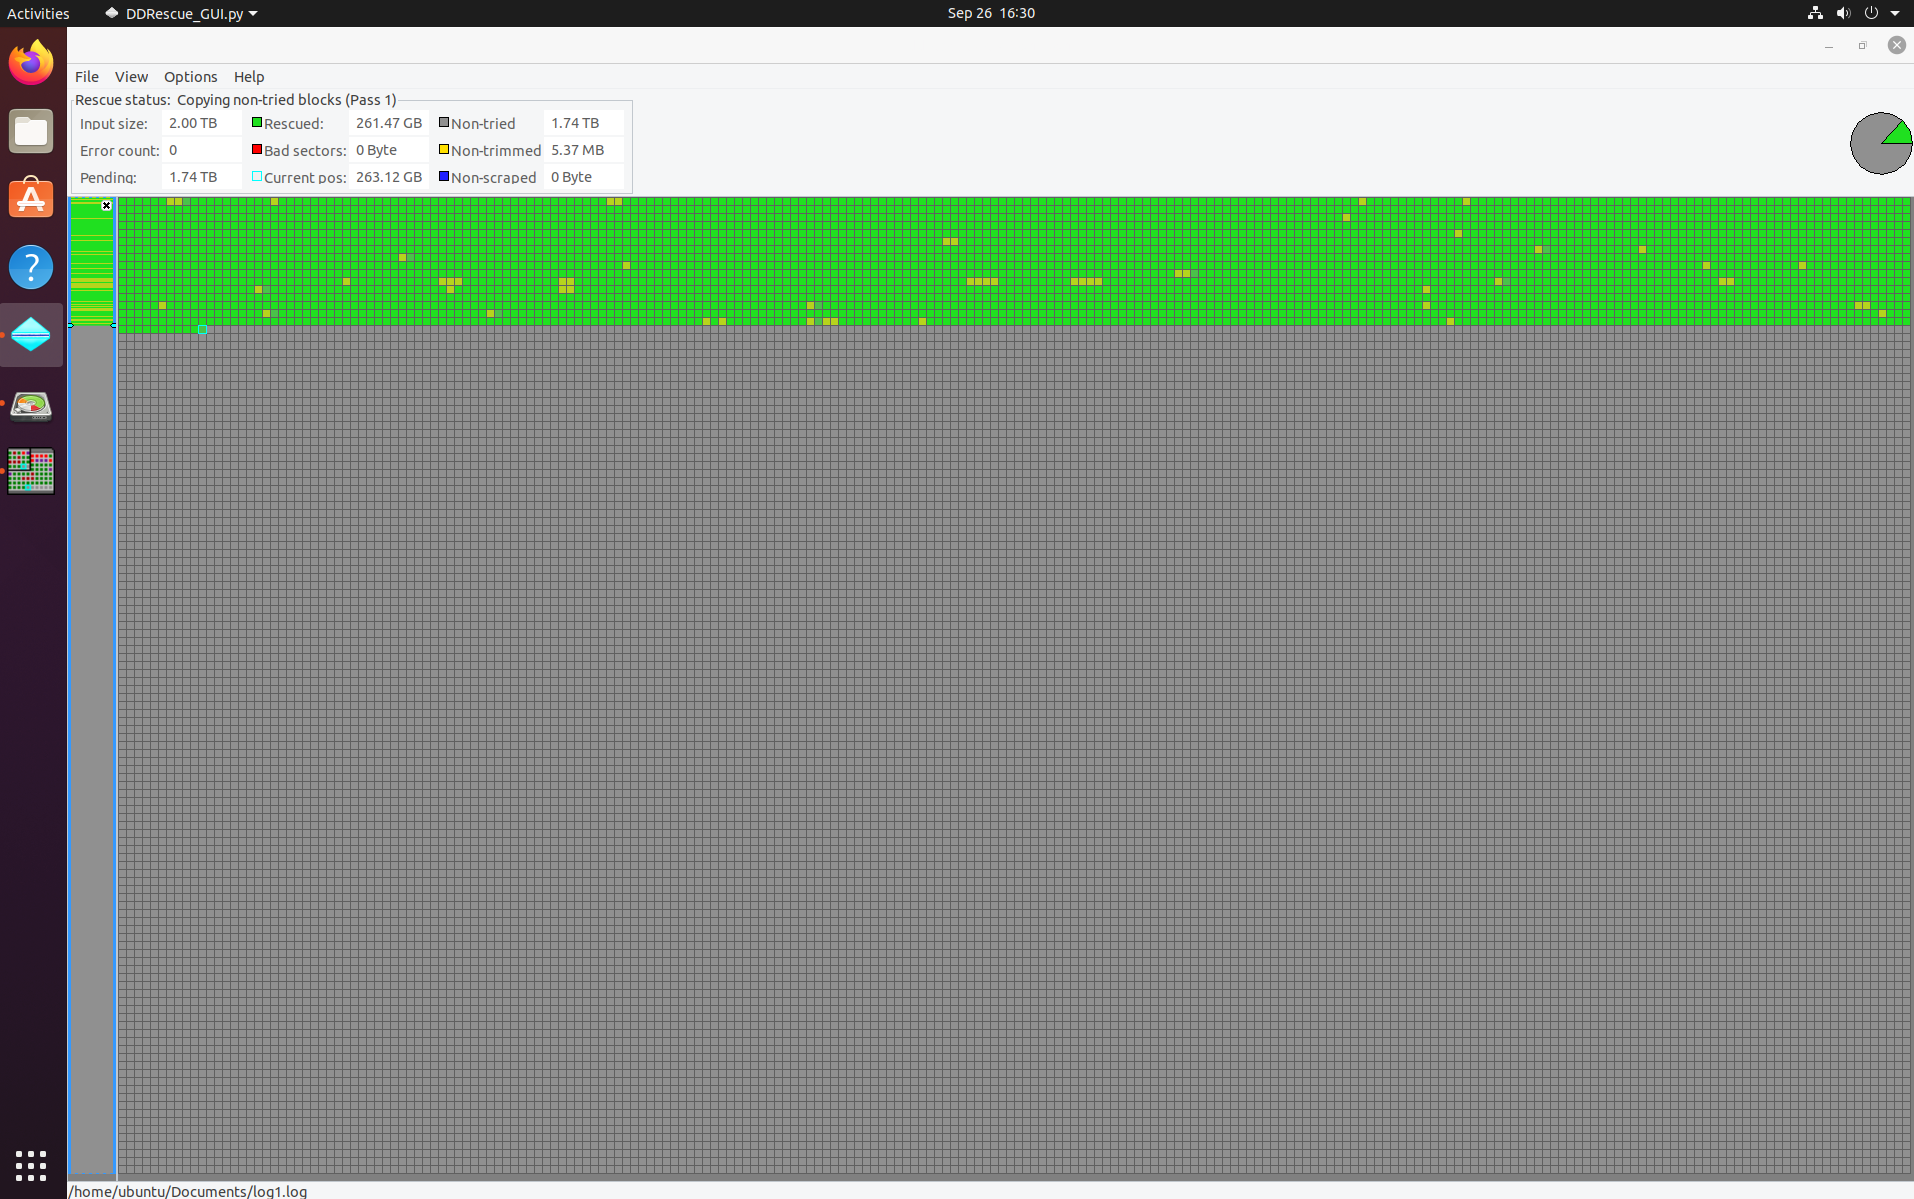
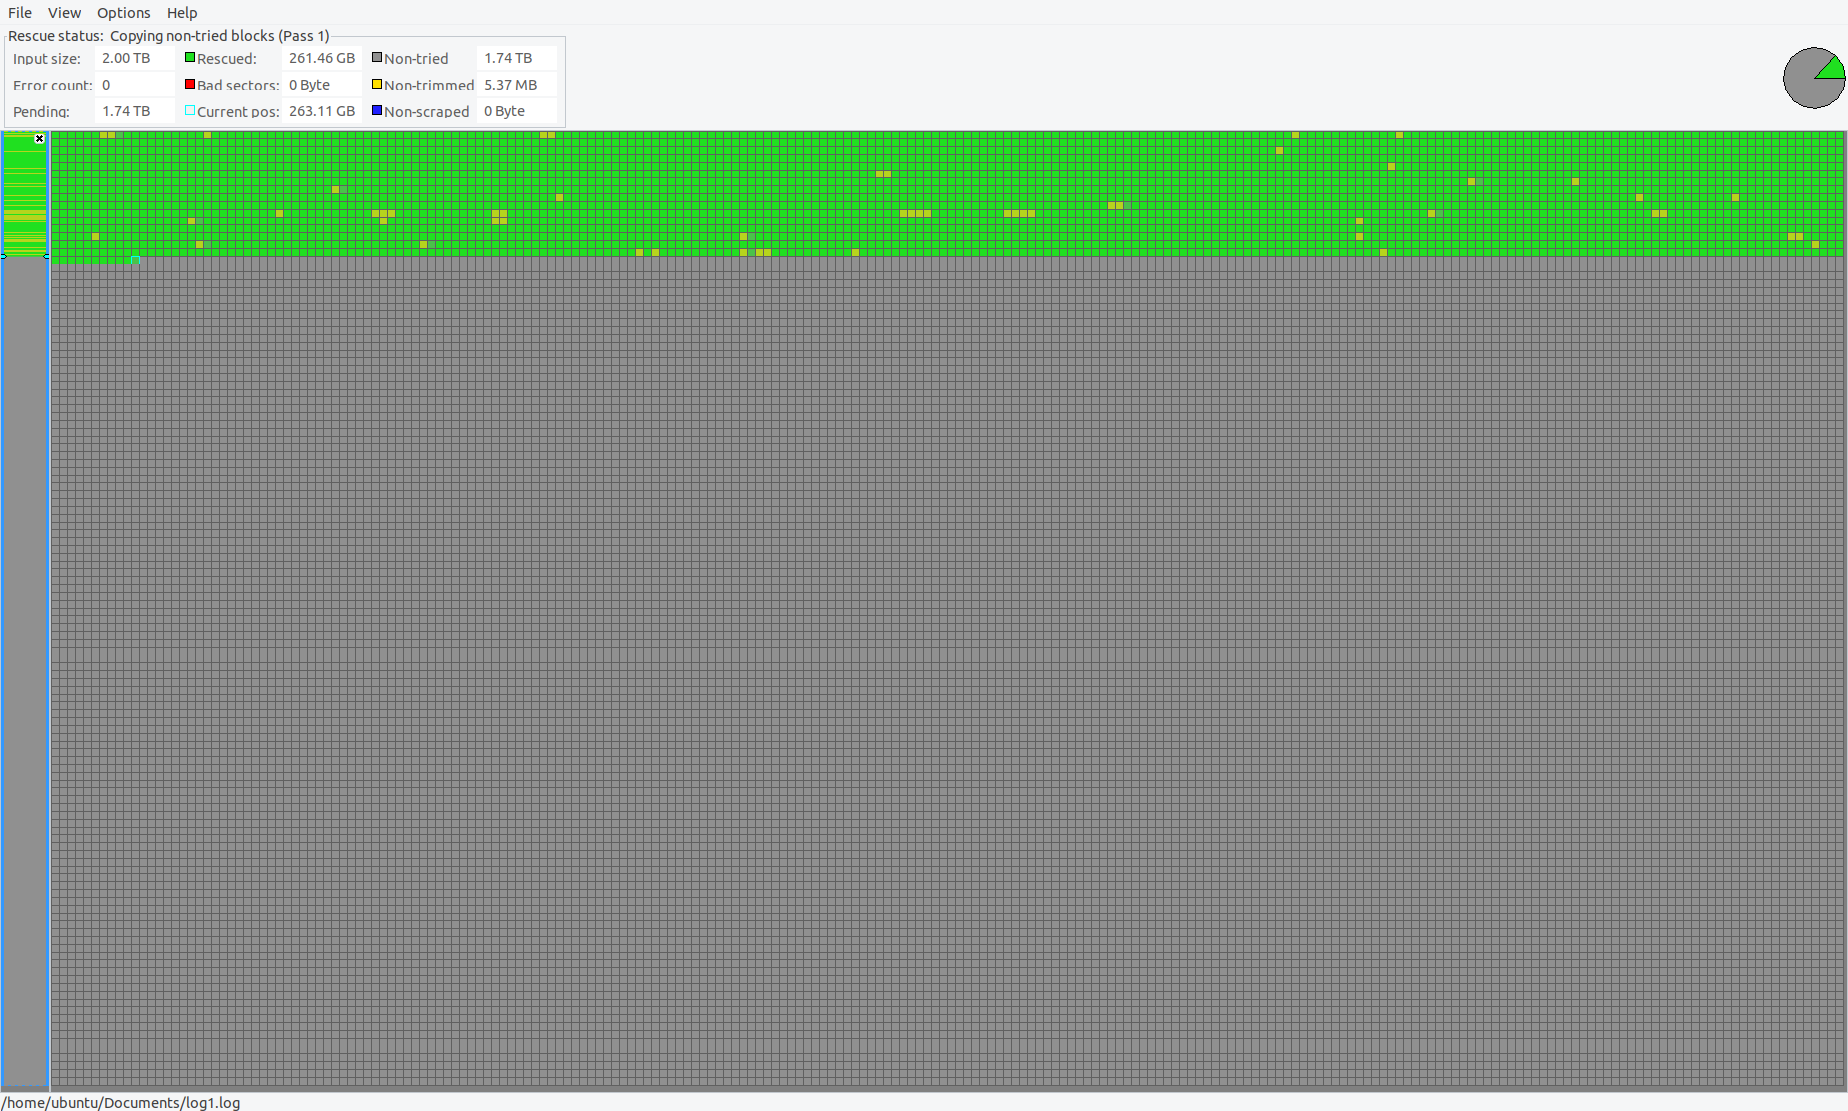
To make ddrescue faster I found it was best to watch the drive speed in ddrescue-gui and then I scrapped it over the command line for a faster experience.
In the end I used these commands, make sure to replace the drives with your setup and the minimum read rate to one your drive is comfortable with. For the first command, I stopped it at around 90 percent of the way through the drive and swapped it for the second one.
# First run to cover myself in case the drive died more seriously.
sudo ddrescue -f --reopen-on-error --min-read-rate=8000 /dev/sdd2 /dev/sdc1 /home/ubuntu/Documents/log1.log

# Lots of Passes to try to recover slow sections.
sudo ddrescue -f --reopen-on-error --retry-passes=5 /dev/sdd2 /dev/sdc1 /home/ubuntu/Documents/log1.log
Although this really seems like a your mileage may vary environment depending on the type of failure your drive has.
If you do end up using ddrescue-gui at least to begin with, you can use the log file to get you a command to start off with. Make sure to read the manual pages for ddrescue to determine the best command for you.
Here is an example of one of my outputs (.log files),
# Mapfile. Created by GNU ddrescue version 1.23
# Command line: ddrescue -v -d -f -r 4 -c 128 /dev/sdd2 /dev/sdc1 /home/ubuntu/Documents/log1.log
# Start time:   2021-09-30 21:55:30
# Current time: 2021-09-30 22:05:21
# Copying non-tried blocks... Pass 2 (backwards)
# current_pos  current_status  current_pass
0x1C63D4C0000     ?               2
#      pos        size  status
0x00000000  0x1E160000  +
0x1E160000  0x00010000  *
0x1E170000  0x01320000  ?
0x1F490000  0x03540000  +
0x229D0000  0x00010000  *
0x229E0000  0x01320000  ?
You can of course view this data using ddrescueview.
DDRESCUE Results
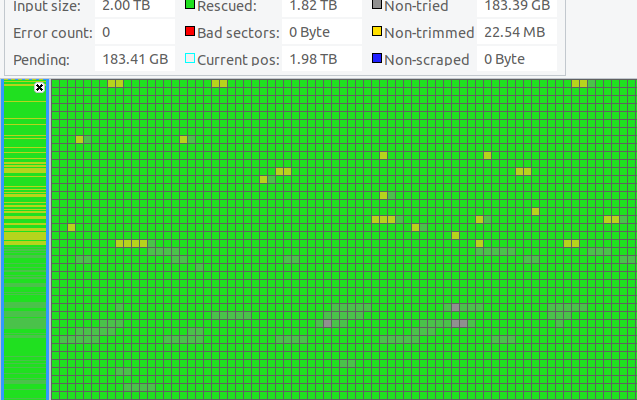
After a week and a bit, I decided to stop the experiment and see what had been recovered. ddrescueview looked like this,
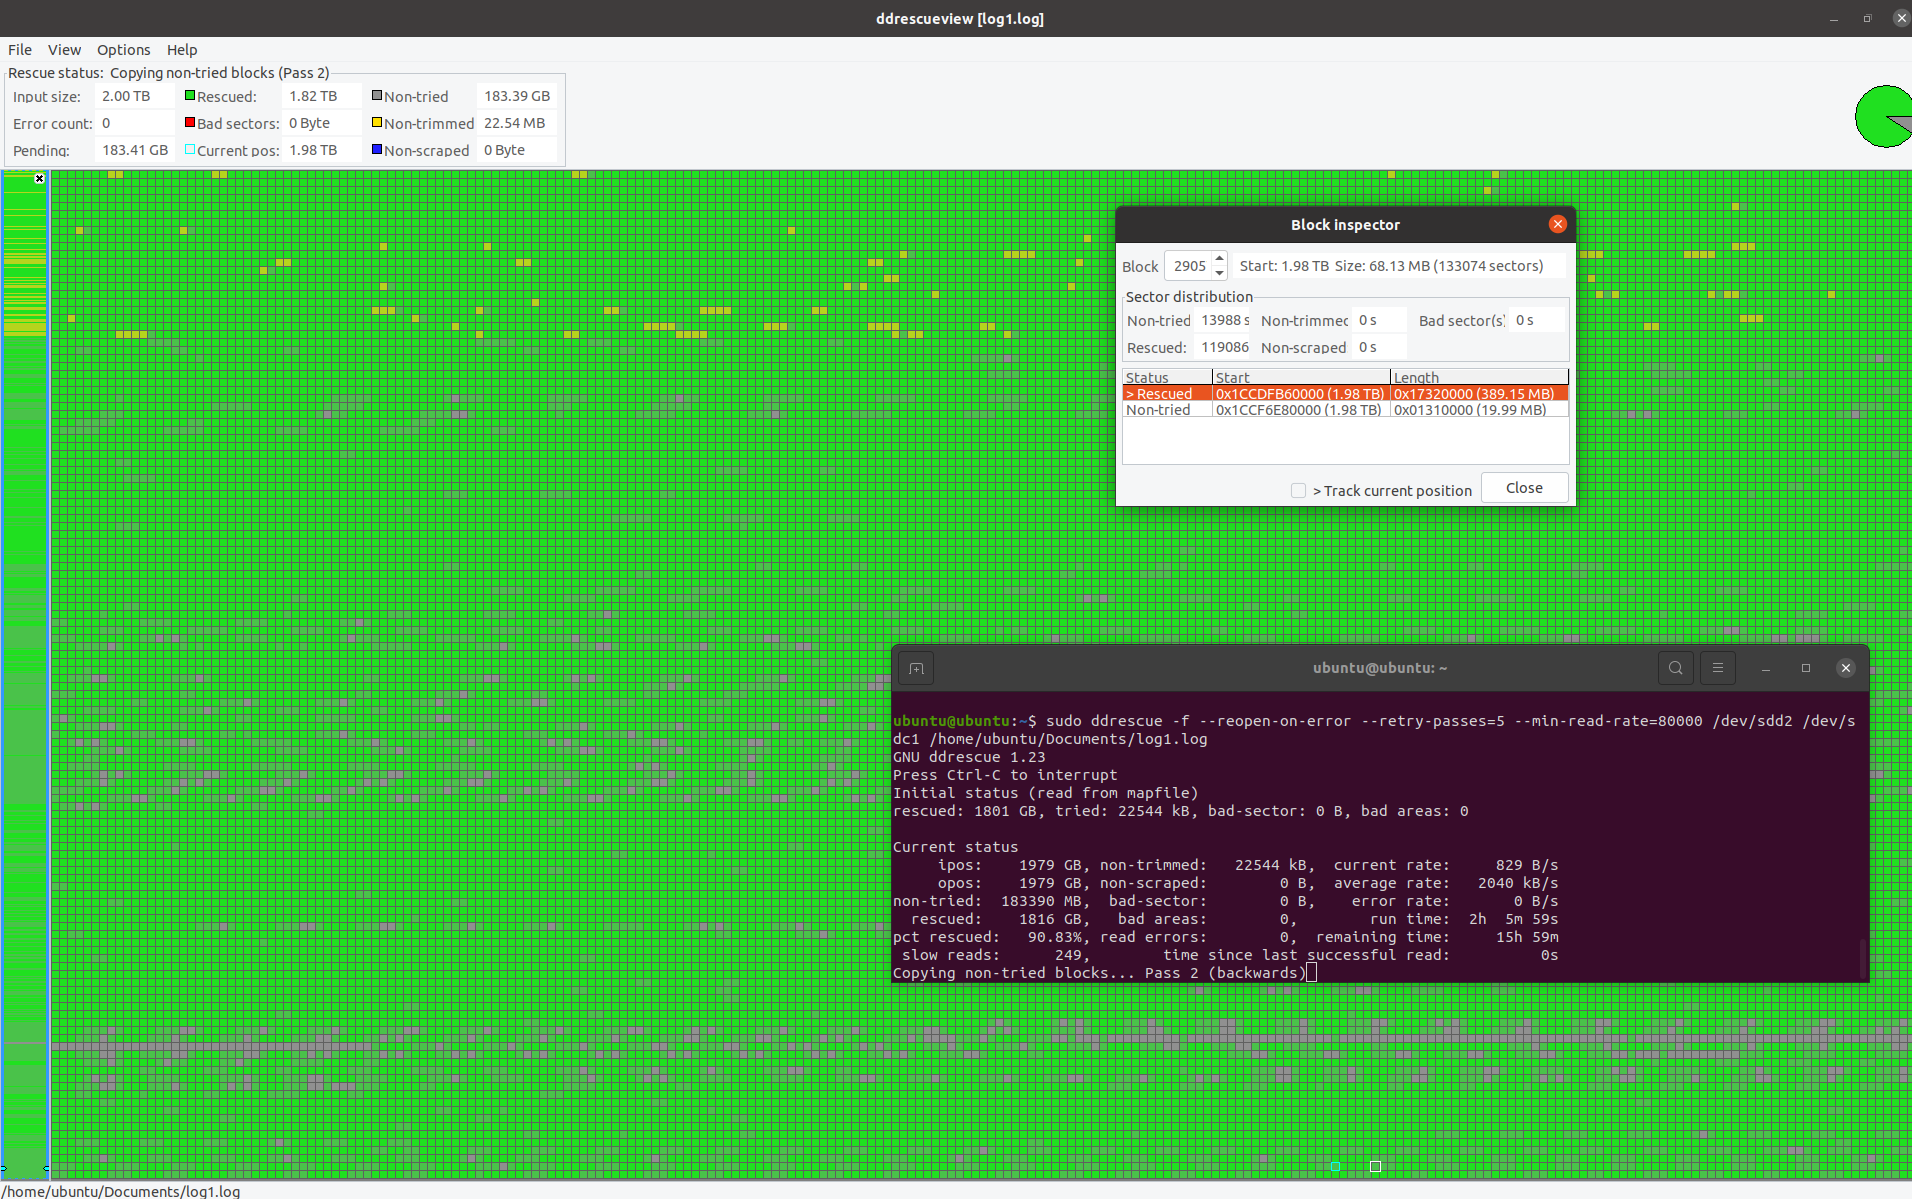
ddrescue was able to recover about 90.83% of the ntfs partition, enough to mount the drive and view the data. It contained many of my important personal files and more importantly images and home video. The actual used space on the drive was only ~700GB, with around ~450GB of data that was valuable to me.
When I opened the personal photos and videos, I found the results to be quite poor, there were glitches in them, sometimes files had no actual data in them, sometimes they had stripes and lines in the image, because of the spread of the failure across the partition blocks, the data was basically a really poor copy with a lot of holes.

I decided that it was best not to continue the recovery with ddrescue and instead restore from backup, the age of the backup was exactly 1 month prior to the failure to the day, so no real loss. However only the data that I truly cared about was backed up. So stuff like my VMware ISO files and downloads folder were lost and unrecoverable.
Downloading from AWS S3 Glacier Deep Archive
Using Cloudberry I made a restore plan and recovered the data using the slowest SLA at 3-5 days, which by sods law took the full amount of time to process and then some, because I put in the wrong decryption password and needed to re-request the data.
Anyway here is the bill, £27.53
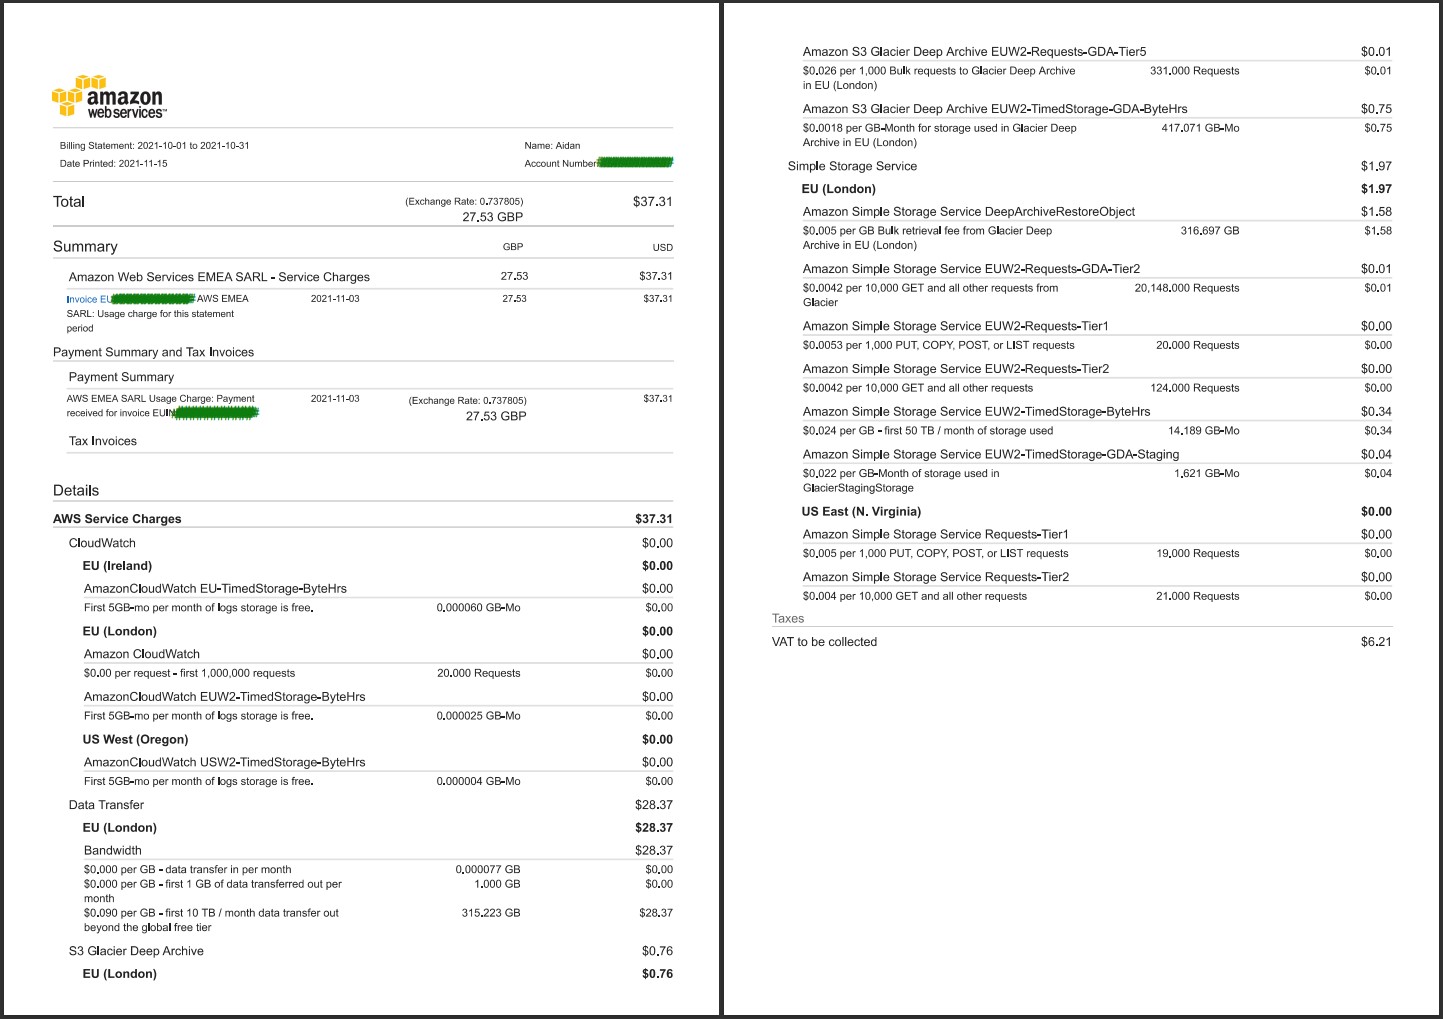
The killer was the data transfer fees out of London, at a cost of $0.09/GB ($28.37).
And with that, all of my data was re-recovered, this time without corruption.
Learnings and Final Thoughts
- Although AWS S3 is a valid backup option, its expensive to recover from. I already pay roughly $1/mo for ~400GB (315GB compressed). For larger recovery this would be prohibitively expensive, multi-terabyte or whole disk backups would require compression.
- Physical damage to a hard drive is essentially game over, your data is lost. For best results have redundancy. This is the only reason I am thankful for S3, it was my only solution to recover my data. A local backup would have been much cheaper and faster to recover.
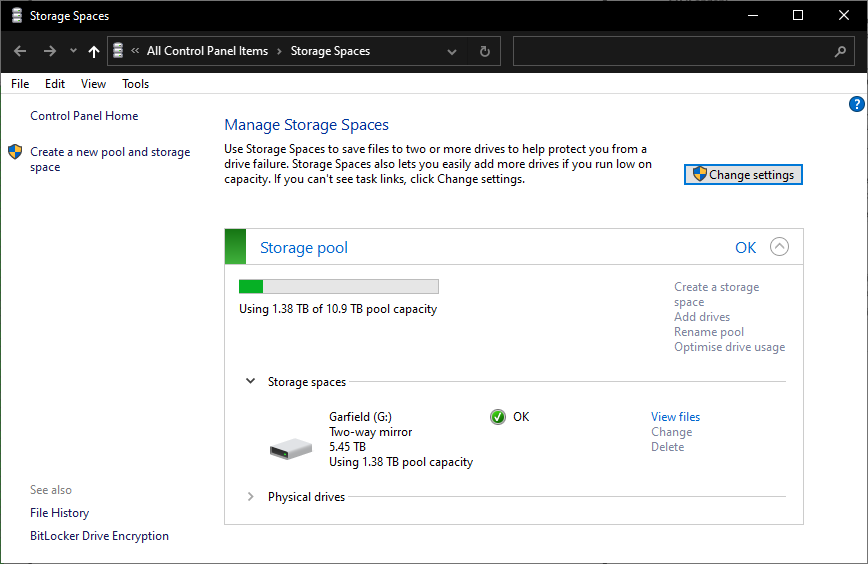
- The two new 6TB drives run in a Windows storage spaces two-way mirror pool.
2 responses to “Recovering my Data after Drive Failure vs AWS S3 Glacier Deep Archive”
Hi, I had a similar experience. I downloaded all my archives. They all appear to be password protected. Any idea what password was used?
Hello Jay, the password is the one set when you set up the archive plan.
Hope this helps.